
Table of Contents
- What You’ll Need Before You Start
- Step-by-Step: How to Clean a Washing Machine Gasket
- Best Cleaner for Washing Machine Rubber Seal
- How to Remove Mold from Washing Machine Gasket
- How to Get Dog Hair Out of Washing Machine Gasket
- How Often to Clean Washing Machine Gasket (and Prevent Mold)
- Troubleshooting Persistent Odor or Leaks
- Frequently Asked Questions
Last Updated: October 13, 2026
What You’ll Need Before You Start
Cleaning a washing machine gasket takes about 20 minutes and a few basic supplies. The gasket is the rubber seal around the door of a front-load washer, and it traps lint, detergent, and moisture with every load.
Here’s what to gather before you start:
- Rubber gloves
- A soft cloth or microfiber towel
- A small scrubbing brush or old toothbrush
Most gasket problems trace back to one thing: moisture left sitting in the folds. A simple routine prevents nearly all of it.
One safety note: unplug the washer or cut power at the breaker. You’ll be reaching into the drum area with wet hands, and the door lock mechanism stays live on many models.
Never mix vinegar and chlorine bleach in the same bowl. The combination releases chlorine gas, which is dangerous in a closed laundry room. Use one cleaner at a time and rinse between them.
Step-by-Step: How to Clean a Washing Machine Gasket
The full process runs about 20 minutes. Follow the steps in order to cover the visible rubber, the hidden folds, and the drainage holes underneath.
Step 1: Inspect the Rubber Seal and Prepare the Washer
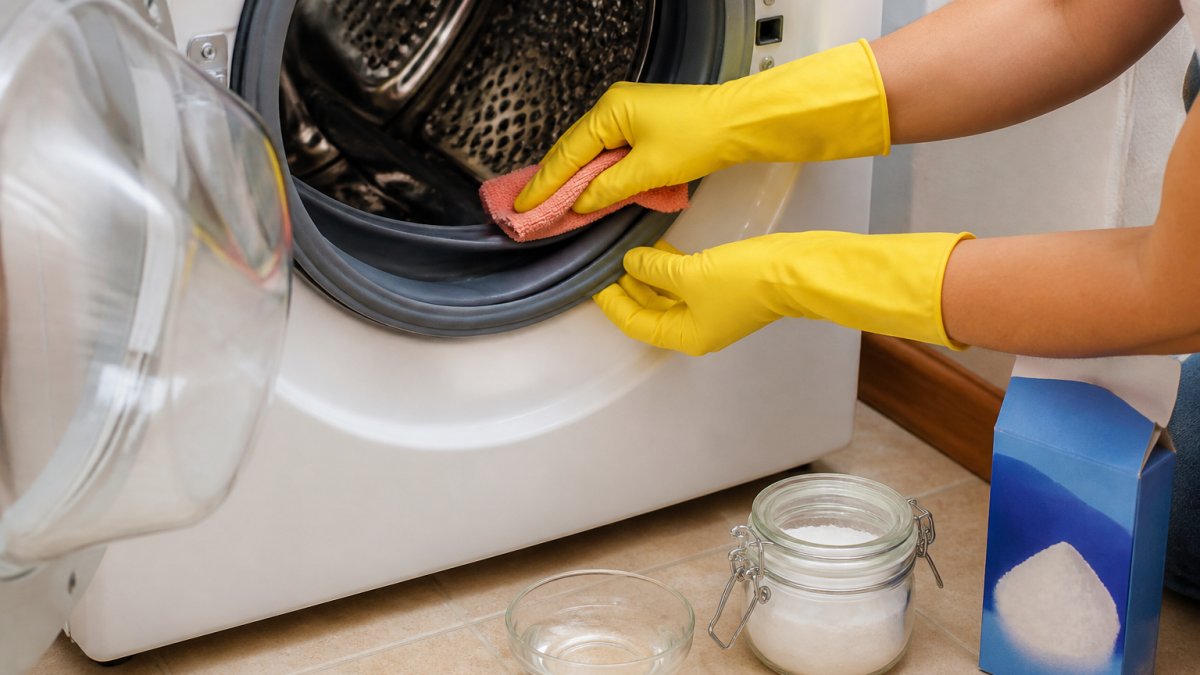
Pull the door open and run your fingers along the entire door seal, checking for grit, dark spots, and standing water.
Check the bottom of the gasket first, gravity pulls water and debris there.
Next, remove by hand any small items caught in the folds, coins, hairpins, and sock lint collect there and cause tears.
Leave the door open while you work. Airflow slows mold growth and makes the gasket easier to reach.
Step 2: Wipe and Scrub the Gasket Folds and Crevices
Dip your soft cloth in warm water with a drop of mild dish soap.
Pull the gasket back from the drum, a hidden fold behind the visible lip collects grime.
Use the toothbrush for the tight spots. A soft brush reaches the folds without tearing the rubber.
Rinse your cloth and wipe the gasket again to lift the paste and loosened dirt.
Step 3: Rinse, Dry, and Run a Cleaning Cycle
Wipe the gasket once more with a clean, damp cloth, then dry it completely with a towel.
Check the drainage holes at the bottom of the gasket, these small openings let water escape.
Run an empty hot water cycle with a washing machine cleaner or a cup of white vinegar in the drum.
Leave the door open when you’re done. That single habit does more to prevent mold than any cleaner.
Best Cleaner for Washing Machine Rubber Seal
The best cleaner for a washing machine rubber seal depends on the gasket material and what you’re removing. Most front-load gaskets are EPDM rubber, though some newer models use silicone or a TPE blend. Each reacts differently to acids, solvents, and abrasives, so match the cleaner to the material rather than reaching for the strongest bottle.
Safe Cleaners by Gasket Material
| Gasket Material | Safe Cleaners | Cleaners to Avoid |
|---|---|---|
| EPDM rubber (most common) | Warm water + mild dish soap, diluted white vinegar, baking soda paste, hydrogen peroxide (3%) | Chlorine bleach on a routine basis, petroleum-based solvents, abrasive powders |
| Silicone | Warm water + dish soap, diluted white vinegar, isopropyl alcohol for stubborn film | Chlorine bleach, scouring pads, citrus-based degreasers (d-limonene can swell silicone) |
| TPE / thermoplastic blend | Warm water + dish soap, hydrogen peroxide (3%) | Vinegar in high concentrations, bleach, abrasive scrubbers |
If you don’t know your gasket material, check the washer manual or the model number lookup on the manufacturer’s site. When in doubt, warm water with a drop of mild dish soap is the safest default.
Matching the Cleaner to the Stain
| Stain or Issue | Best Cleaner | How to Apply |
|---|---|---|
| Light grime | Warm water + dish soap | Wipe with soft cloth |
| Odor | White vinegar (diluted 1:1 with water) | Wipe, then rinse |
| Stubborn residue | Baking soda paste (3 parts soda, 1 part water) | Apply, wait 5 minutes, scrub gently |
| Mildew spots | Hydrogen peroxide (3%) | Dab on, let sit 10 minutes, rinse |
| Greasy film | Dish soap + warm water | Scrub, then rinse well |
| Hard water film | Diluted white vinegar | Wipe, let sit 2 minutes, rinse |
Cleaners to Avoid and Chemical-Mixing Warnings
Skip abrasive cleaners and scouring pads, they scratch the rubber and create tiny cracks where mold takes hold, and no cleaner reaches the spores inside those cracks.
Avoid chlorine-based cleaners routinely, they dry out and degrade the seal over time, especially EPDM. Occasional use for a severe mold outbreak is fine; weekly bleach wipes are not.
Never combine bleach with vinegar or ammonia, the fumes are toxic.
Mixing cleaners is the most common mistake in gasket cleaning. Vinegar plus bleach releases chlorine gas. Vinegar plus hydrogen peroxide creates peracetic acid, which is corrosive. Use one cleaner per cleaning session, rinse thoroughly, and let the gasket dry before switching products.
Rub a thin layer of plain water on the gasket after cleaning and check how it beads. If water soaks in instead of beading, the rubber is drying out and may need replacement soon.
Check Your Manual Before You Start
Manufacturer guidance varies: some brands approve vinegar, others warn against it because of acetic acid’s effect on their rubber compound. Check your manual or model number before applying anything stronger than dish soap, it also protects your warranty if a gasket defect shows up later.
How to Remove Mold from Washing Machine Gasket
To remove mold from a washing machine gasket, start with the mildest method and work up. Surface mold wipes away with vinegar or hydrogen peroxide; deep black buildup inside the rubber usually means the seal needs replacing. Know which situation you’re in before you spend an hour scrubbing.
Light Surface Mold vs. Deep Black Buildup: A Decision Tree
Work through these steps in order. Stop as soon as the mold is gone and the gasket passes the water-bead test.
Step 1: Identify the mold type.
- Light gray or pink film that wipes off with a damp cloth: surface mold. Clean with diluted white vinegar or 3% hydrogen peroxide, then dry fully.
- Dark spots on the surface that resist a damp cloth: embedded surface mold. Make a baking soda paste, apply, wait 5 minutes, scrub gently with a soft brush, rinse, and dry.
- Black streaks inside the rubber fold that you can see but not reach with a cloth: deep mold. Try a 10-minute hydrogen peroxide soak on a cloth pressed into the fold. Rinse and dry.
Step 2: Apply the recurrence test.
After cleaning, dry the gasket completely and leave the door open. Wait one week of normal washing.
Step 3: Check the surrounding system.
Mold on the gasket often traces back to a clogged drainage hole, a dirty detergent tray, or a pump filter that’s recirculating odor.
When Cleaning Isn’t Enough: Replacement and Warranty Considerations
If mold keeps coming back after two or three cleanings, the rubber is holding spores in its pores, cleaning only hides the problem, and replacement is the fix.
A torn or stiff gasket also needs replacement. Look for these signs:
- Cracks visible when you pull the gasket back from the drum
- A loose fit where the gasket no longer seats against the door
- Water pooling under the door after a cycle
Check your washer’s warranty before replacing anything, some manufacturers cover gasket defects within a set period, and non-approved cleaners can void that coverage.
A replacement gasket is a straightforward repair and far cheaper than ignoring a slow leak that damages your floor.
The one-week recurrence test is the clearest signal. If mold comes back within a week of a thorough cleaning, the gasket is colonized and replacement is the only permanent fix.
How to Get Dog Hair Out of Washing Machine Gasket
To get dog hair out of a washing machine gasket, wipe the seal with a damp rubber glove or cloth first, water grabs the hair, while a dry cloth just pushes it around.
Pet hair is stubborn because it sticks to the rubber and works into the folds. Here’s what works:
- Put on a rubber glove and dampen it. Wipe the gasket in one direction.
- Rinse the glove, then wipe again. Repeat until no hair comes off.
- Use a damp cloth for the folds and crevices.
A lint roller helps on the flat parts of the seal. For the folds, a damp toothbrush reaches where your fingers can’t.
Wash pet blankets separately and shake them outside first. Less hair in the drum means less hair in the gasket.
How Often to Clean Washing Machine Gasket (and Prevent Mold)
Clean the washing machine gasket once a month, and wipe it down after any load that leaves it wet. Monthly cleaning keeps mold from getting a foothold. The after-load wipe is what actually stops it.
Monthly Cleaning Routine and Drying Practices
A simple routine covers it:
- Wipe the gasket with a damp cloth once a month.
- Dry the seal fully after every wash.
- Leave the door open between loads so air moves through.
Drying practices matter most. Moisture is the fuel for mold, and a closed door traps it. If your laundry room stays humid, a small fan pointed at the open door helps.
The single habit that prevents gasket mold is leaving the washer door open after every load. Cleaning removes mold; drying keeps it from coming back.
Troubleshooting Persistent Odor or Leaks
A smell that survives cleaning usually comes from somewhere other than the gasket surface, check the drainage holes, detergent tray, and pump filter.
Leaks are different: water under the door after a cycle points to a worn or misaligned gasket, while water during the spin cycle could be a loose door or clogged drain.
Run through this before you call anyone:
- Confirm the gasket is seated properly all the way around.
- Clear the drainage holes at the bottom of the seal.
- Clean the detergent tray and dispenser.
If the leak continues after all of that, the gasket or another part needs attention.
Frequently Asked Questions
What is the best thing to clean the rubber seal on a washing machine?
For routine cleaning, a 1:1 mix of white vinegar and water works well on most rubber gaskets. For heavier grime or early mold, a paste of baking soda and water applied with a soft cloth or small scrubbing brush is effective. Hydrogen peroxide can tackle stubborn stains, but test it on a small area first. Always avoid abrasive cleaners like bleach or chlorine-based products unless the manufacturer explicitly approves them, as they can dry out and crack the rubber seal.
How do I remove mold from a washing machine gasket?
Start by wiping the gasket with a damp cloth to remove loose dirt. For light surface mold, spray a vinegar-water solution, let it sit for 10 minutes, then scrub the folds with a soft brush and rinse. If the mold is black and embedded in the rubber, mix a baking soda paste, apply it to the affected areas, and scrub gently. For persistent mold, a diluted hydrogen peroxide solution can help, but never mix it with vinegar. If mold returns quickly or covers a large area, the gasket may need professional replacement.
How often should you clean a washing machine gasket?
Clean the gasket monthly as part of regular maintenance. If you wash pet bedding, heavily soiled work clothes, or run frequent cold-water cycles, clean it every two weeks. After each wash, leave the door and detergent tray open to let moisture escape. Wiping the seal with a damp cloth once a week takes less than a minute and prevents most mold and odor problems from starting.
Can you use bleach to clean a washing machine gasket?
Bleach can kill mold on the gasket, but it is risky for the rubber. Chlorine-based cleaners may cause the seal to dry out, crack, or discolor over time, and some manufacturers void the warranty if bleach damage is found. If you choose to use bleach, dilute it heavily (1 part bleach to 10 parts water), wear gloves, ventilate the room, and never mix it with vinegar or ammonia. A safer first choice is vinegar, baking soda, or a manufacturer-approved washing machine cleaner.
Persistent odor or a leak that won’t quit usually means the gasket or a related part has reached the end of its life. That’s when a professional diagnosis saves you time and money. Tampa Bay Appliance Repair LLC offers free diagnostics with any repair, licensed and insured technicians, and same-day appointments for most requests. Book online and get your washer running like it should.