
Table of Contents
- How to Tell If Your Appliance Is Worth Repairing
- When to Replace vs Repair Appliances
- Dishwasher Making Loud Noise Repair: What the Sound Tells You
- Benefits of Hiring Licensed Appliance Repair Technicians
- Smart Appliance Diagnostics and Error Codes
- Preventative Maintenance and Sustainability
- Conclusion
- Frequently Asked Questions
Last Updated: September 27, 2026
How to Tell If Your Appliance Is Worth Repairing
The average American household runs more than a dozen powered appliances, and when one fails, the repair-or-replace decision rarely has a clean answer. Appliance repair is often cheaper, but only when the math and the machine’s age both support it. This guide from Tampa Bay Appliance Repair LLC covers the frameworks and signals that separate a smart repair from a money pit.

The 50% Rule and Other Decision Frameworks
The 50% rule is a starting filter, not a verdict. A refrigerator that costs more to repair than half its replacement value is a replacement candidate, but age and remaining lifespan should override the raw number in some cases.
Three frameworks cover most situations:
- The 50% rule – repair cost versus half the replacement price.
- The age-to-lifespan ratio – if the unit is past 75% of its expected lifespan, replacement is usually smarter.
- The repeat-failure test – two major repairs in 18 months signals a unit nearing the end of its service life.
Ask your technician for the repair cost as a percentage of replacement cost before you decide. A good technician will give you that number without being asked, because it reframes the whole conversation.
Appliance Lifespan Benchmarks
Knowing how long each appliance should last turns a guess into a calculation. These benchmarks reflect typical service life with normal use and basic maintenance:
| Appliance | Typical Lifespan | Common Failure Point |
|---|---|---|
| Refrigerator | 10-15 years | Compressor, sealed system |
| Washing machine | 8-12 years | Drum bearings, control board |
| Dryer | 10-13 years | Heating element, vent blockage |
| Dishwasher | 8-10 years | Pump, door latch |
| Oven or range | 12-15 years | Heating element, igniter |
When to Replace vs Repair Appliances
The replace versus repair decision comes down to three variables: age, repair cost relative to replacement, and how often the unit has already needed service. When all three point toward replacement, stop spending; when two or more point toward repair, fix it.
Here is the practical breakdown:
- Repair when: the unit is under half its expected lifespan, the repair is minor, and this is the first significant failure.
- Replace when: the unit is past 75% of its lifespan, the repair is a major component, or you have already paid for two repairs in the last year and a half.
- Get a second opinion when: the diagnosis involves a sealed system, a control board, or anything the technician cannot explain clearly.
Never approve a sealed-system repair on a refrigerator without confirming the technician is certified to handle refrigerant. Improper handling is both illegal and a health risk, and it can void your manufacturer warranty.
Dishwasher Making Loud Noise Repair: What the Sound Tells You
A dishwasher making loud noise repair usually starts with identifying the sound, because each noise points to a specific component. Matching the sound to the fault saves diagnostic time.
Common Causes and DIY Checks
Grinding typically means something is obstructing the wash impeller or drain pump. Humming with no water movement points to a failing pump motor. Rattling can be a loose dish or worn spray arm. Banging during the drain cycle usually traces to a kinked drain hose or failing pump.
Before calling anyone, run these checks:
- Clear the filter and sump – food debris is the most common culprit.
- Inspect the spray arms – remove them and check the holes for blockages.
- Check the drain hose – look for kinks or clogs behind the unit.
- Level the machine – an unlevel dishwasher rattles against the cabinet.
- Listen to the cycle phase – noise during wash points to the pump; noise during drain points to the hose.
Benefits of Hiring Licensed Appliance Repair Technicians
Licensed technicians bring more than a toolbox. They carry diagnostic equipment, know the schematics for major appliances across many makes and models, and can tell you when a repair is not worth the money, often saving homeowners more than the labor cost.
- Safety protocols – gas lines, refrigerant, and high-voltage components require training to handle safely.
- Proper diagnostics – a technician reads error codes and traces faults instead of guessing at parts.
- Warranty protection – unauthorized repairs can void manufacturer warranty coverage.
- Upfront pricing – a reputable provider gives you a service estimate before work begins.
A repair that fixes the symptom without finding the cause is not a repair. It is a delay. Insist on a clear diagnosis before you approve any work.
Smart Appliance Diagnostics and Error Codes
Modern appliances diagnose themselves, and most homeowners never read the message. A refrigerator, washer, or oven that flashes a code or blinks a status light is telling you which subsystem failed. Learning to read those codes is the fastest way to decide whether a problem is a five-minute fix or a service call.
How to Pull the Code
Not every appliance shows codes on its own. Many require a short button sequence to enter diagnostic mode:
- Washers and dryers – common sequences involve pressing a combination of cycle and option buttons (often two or three at once) and holding for a few seconds. The exact sequence is printed on the tech sheet, usually tucked behind the lower front panel or inside the console.
- Refrigerators – many models display codes automatically on the main control board or a front panel. On units without a display, a blinking LED on the board counts out the fault in a pattern.
- Ovens and ranges – most show a fault code (often an “F” followed by a number) directly on the display when a sensor or control fault occurs.
- Dishwashers – codes typically appear as a blinking light pattern tied to the wash or drain cycle.
What the Codes Actually Mean
Error codes cluster into a few families, and the family tells you how serious the fault is:
- Sensor faults – a thermistor, humidity sensor, or pressure sensor has failed or drifted out of range. These are usually inexpensive parts and often a straightforward swap.
- Communication faults – the main control board cannot talk to a component board. This frequently traces to a single failed board or a loose wire harness connection.
- Mechanical faults – a motor, pump, valve, or fan has stopped responding. Repair cost depends entirely on which component and how accessible it is.
- Door and latch faults – a door switch or latch sensor is not reporting closed, which locks out the cycle.
Reading the Trade-Off
A sensor or communication fault on a unit with years of life left is usually worth repairing, because the fix is often one board or one sensor. A mechanical fault is a different calculation. A failed drain pump on a six-year-old washer is worth fixing. The same failure on a 12-year-old machine usually is not.
Photograph the code on the display before you call anyone. Technicians can often pre-diagnose over the phone from a photo, which shortens the visit and sometimes avoids it entirely.
Wi-Fi and App-Based Diagnostics
Many newer appliances connect to a home network and push diagnostic data to a manufacturer app. When these work, they can report a fault before the appliance stops running, and some run a self-test on demand. The catch: connectivity varies widely by brand and model, and a unit that has dropped off the network reports nothing. If your appliance supports it, keep it connected and check the app’s notification settings.
Preventative Maintenance and Sustainability
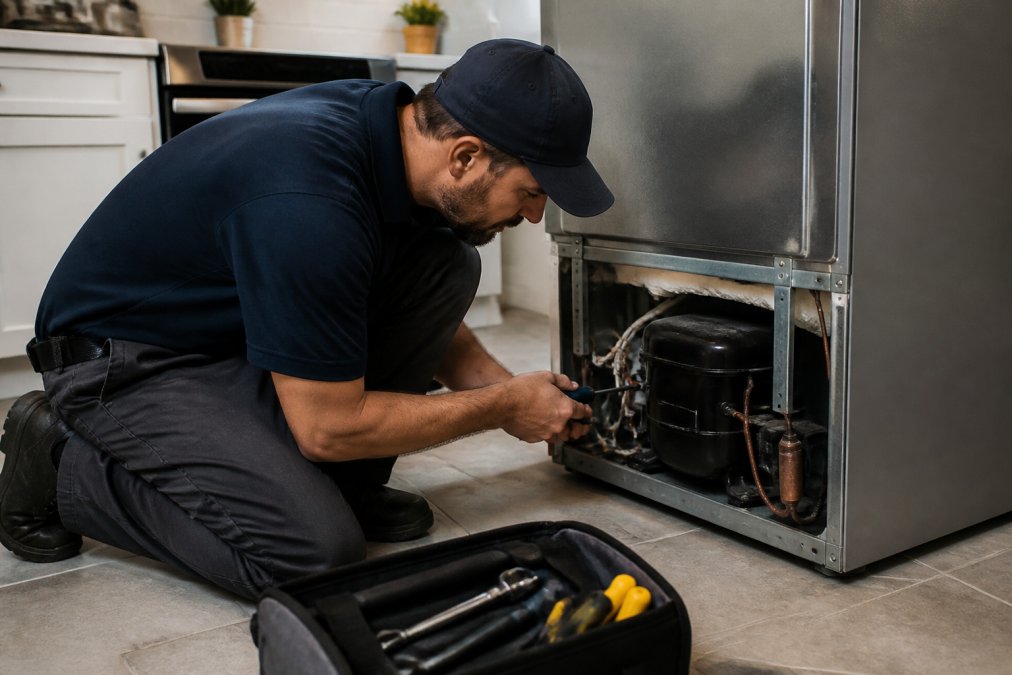
Preventative maintenance does two things at once: it stretches an appliance’s service life and cuts the environmental cost of replacement. Every machine you keep running is one fewer unit manufactured, shipped, and eventually landfilled. The routine tasks are simple and need only a small set of tools.
A Starter Tool Kit for Appliance Maintenance
You do not need a full workshop. A basic kit covers most homeowner-level maintenance and light troubleshooting:
- Nut drivers and a screwdriver set – most appliance fasteners are hex-head screws, so a set of nut drivers in common sizes (typically 1/4-inch and 5/16-inch) handles most panels.
- A multimeter – the single most useful diagnostic tool. It tests continuity, voltage, and resistance, which is how you confirm whether a heating element, fuse, or switch has actually failed.
- Pliers and a adjustable wrench – for hose clamps, water lines, and fittings.
- A shop vacuum with a crevice tool – for condenser coils, dryer vents, and drain areas.
- A flashlight or headlamp – most failures hide behind or under the unit.
- A putty knife or panel tool – for prying off trim and access panels without cracking plastic.
- A notebook or phone camera – photograph the wiring and hose routing before you disconnect anything.
The Highest-Impact Maintenance Tasks
- Clean the dryer vent and lint trap after every load
- Vacuum refrigerator condenser coils twice a year
- Run a dishwasher cleaning cycle monthly
- Check washing machine hoses for cracks annually
- Wipe oven door seals and check for gaps
- Clear the area behind the refrigerator for airflow
- Inspect the dryer vent duct run for crushed or kinked sections
Dryer vent cleaning is the one most homeowners skip, and it carries the biggest consequence. A clogged vent forces the dryer to run longer, wearing the heating element and driving up energy use. It is also a leading cause of house fires, making it a safety task, not just maintenance.
The Sustainability Math
Repair almost always beats replacement on environmental impact when the unit is still inside its expected lifespan. Manufacturing a new appliance carries a large upfront footprint in raw materials, energy, and shipping, and the old unit’s components and refrigerant must be handled correctly at disposal. Keeping a working machine running avoids that entire cycle.
Maintenance is the cheapest repair you will ever make. A clean condenser coil, an unclogged dryer vent, and intact water hoses prevent the failures that cost the most to fix.
Conclusion
The repair-or-replace decision rewards homeowners who know their appliance’s age, understand the 50% rule, and can read the signals a failing machine sends. Get those three right and you will avoid both overspending on a dying unit and replacing a machine that had years left.
Frequently Asked Questions
Are appliances worth repairing?
It depends on age, repair cost, and appliance type. The 50% rule helps: if the repair costs more than half the price of a new appliance, replacement often makes sense. For expensive models under 8 years old, appliance repair is usually worth it. Refrigerators, washers, and dryers are often worth fixing because replacement costs are high. A licensed technician can give you an honest estimate before you commit.
How do I know if my dishwasher is worth repairing?
If your dishwasher is under 8 years old and the repair costs less than half the price of a new one, repair is usually the better call. A dishwasher making loud noise repair might involve a worn pump, a foreign object in the impeller, or a failing motor. A technician can diagnose the exact cause and give you a clear estimate. If the unit is over 10 years old and the repair is major, replacement may be smarter.
What should I look for when hiring a licensed appliance repair technician?
Check for state licensing and insurance. Ask whether the diagnostic fee applies toward the repair if you proceed. A licensed technician should provide a written estimate before starting work and explain the diagnosis clearly. Look for EPA Section 608 certification if the repair involves refrigerants.
How often should I schedule preventative maintenance for my home appliances?
Once a year is a good baseline for most major appliances. Refrigerators benefit from annual coil cleaning, washers need periodic drum and seal checks, and dryers should have vent cleaning every 6 to 12 months to prevent lint buildup and fire risk. Dishwashers do well with a yearly inspection of the pump and filter. Preventative maintenance extends appliance lifespan and catches small issues before they become expensive failures.