
Table of Contents
- Start With the Most Common Causes of a Dryer Not Heating
- Check the Circuit Breaker, Power Cord, and Door Switch First
- How to Test a Dryer Thermal Fuse With a Multimeter
- Signs of a Clogged Dryer Vent (and How to Clear It)
- Inspect the Heating Element, Thermostats, and Gas Igniter
- Dryer Heating Element Replacement Cost and Repair Decisions
- When to Stop DIY and Call a Licensed Technician
- Frequently Asked Questions
Last Updated: September 28, 2026
Start With the Most Common Causes of a Dryer Not Heating
A dryer not heating up usually traces back to one of five things: a tripped breaker, a clogged vent, a blown thermal fuse, a failed heating element, or a bad door switch. Most of these are testable at home with basic tools.
Electric vs. Gas Dryers: The First Thing to Check
Electric dryers heat with a coil. Gas dryers heat with an igniter and flame. That single difference changes your whole troubleshooting path.
- Electric: Check the breaker, power cord, heating element, and thermostats.
- Gas: Check the gas supply valve, igniter, and flame sensor.
Your 5-Minute Reset Checklist Before Testing Anything
Try these first. They cost nothing and fix a surprising share of no-heat calls.
- Confirm the dryer is plugged in fully.
- Check the breaker box for a tripped switch.
- Make sure the door latches shut.
- Select a timed heat cycle, not air fluff.
- Run it for five minutes and feel for warmth.
If it’s still cold after that, move to testing.
Check the Circuit Breaker, Power Cord, and Door Switch First
The circuit breaker is the most common culprit behind a dryer not heating. Electric dryers run on two separate breaker poles. One pole can trip while the other stays on, so the drum still spins but the heat dies.
Then check these:
- Power cord: Look for scorch marks or a loose plug at the wall.
- Door switch: The dryer won’t heat if it thinks the door is open. Press the switch by hand and listen for a click.
- Terminal block: Where the cord meets the dryer, check for loose or burnt wires.
Never pull the dryer out by the cord. It loosens the terminal block connections and can cause a short. Pull from the body instead.
How to Reset a Dryer That Isn’t Heating
Unplug the dryer for one full minute. Plug it back in. Then press and hold the start button for five seconds. This clears the control board and resets the timer control on many models.
How to Test a Dryer Thermal Fuse With a Multimeter
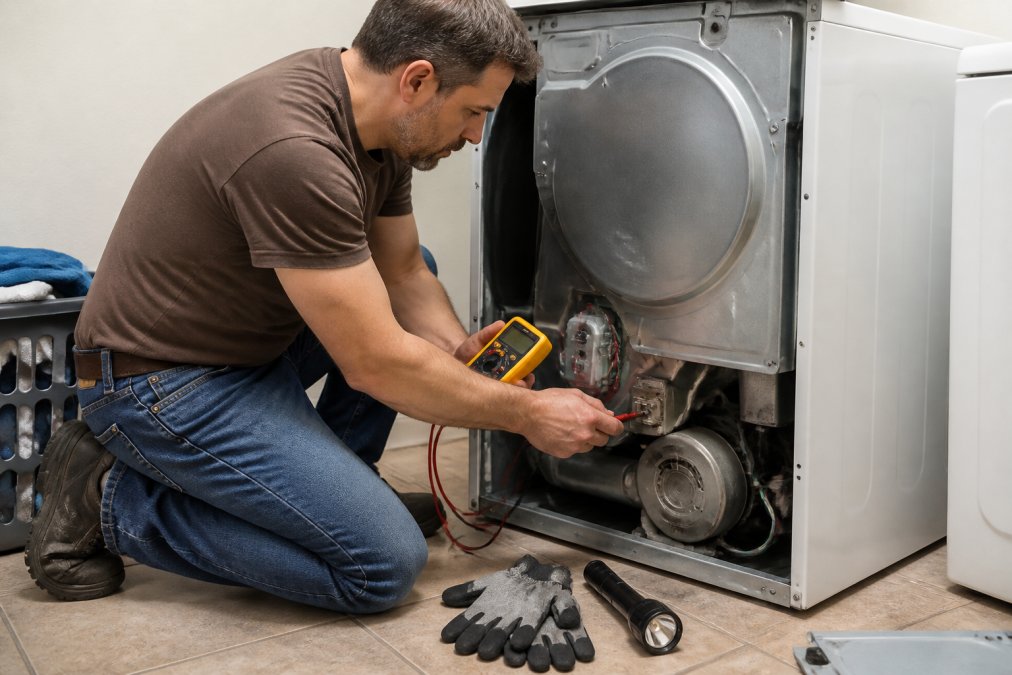
A thermal fuse is a one-time safety switch. When the dryer overheats, the fuse blows and stays blown, it does not reset. That is why a dryer can tumble normally but never produce heat after a single overheating event. Testing it takes about ten minutes and is the single most useful DIY skill for this repair.
What a Blown Thermal Fuse Looks Like
Before you even grab the meter, look at the fuse. Most thermal fuses are a small white or gray plastic body with two metal terminals, mounted on the blower housing or the exhaust duct inside the cabinet. A blown fuse often shows one of these visual cues:
- A scorched, browned, or melted plastic body.
- A visible break or bulge in the internal element (on clear-bodied fuses).
- Discolored or brittle wire insulation at the terminals.
- No visible damage at all, which is common, and why you still need the meter.
Setting Up Your Multimeter for a Continuity Test
- Unplug the dryer from the wall. Confirm the plug is out, not just switched off.
- Remove the back panel (most dryers: a few hex-head screws along the perimeter).
- Locate the thermal fuse. It is usually a small two-terminal part on the blower housing or exhaust path, often with two wires attached.
- Disconnect at least one wire from the fuse so you are testing the fuse alone, not the surrounding circuit.
- Turn the multimeter dial to the continuity setting (often marked with a diode/sound-wave icon) or to the lowest resistance range (200 ohms).
- Touch one probe to each fuse terminal. Hold steady, do not let probes touch each other.
Reading Your Multimeter: Continuity Test Results
A good fuse shows continuity, meaning the circuit is complete. A blown fuse shows no reading at all, often displayed as OL (over limit) or 1 on the left of the display.
- Beep or near-zero reading (typically under 1 ohm): fuse is good, look elsewhere.
- OL, 1, or no reading: fuse is blown, replace it.
- A reading that jumps around: dirty or loose terminals, clean them and retest before condemning the fuse.
A blown thermal fuse almost always means the dryer overheated once already. Replace the fuse, but also clean the vent and check the high-limit thermostat. Otherwise the new fuse blows again within weeks.
The Same Test Works on These Parts
Once you have the meter out, use the identical procedure on the other heat-path components while the cabinet is open:
- High-limit thermostat: should show continuity when cold; if it reads OL, it tripped and needs replacement.
- Cycling thermostat: should show continuity at room temperature; a reading of OL means it failed open.
- Heating element terminals: should show a low but non-zero resistance (typically in the range of roughly 8 to 50 ohms depending on wattage), OL means the coil is broken.
Signs of a Clogged Dryer Vent (and How to Clear It)
A clogged vent is the leading cause of overheating, and overheating is what kills thermal fuses. The signs of a clogged dryer vent are easy to spot once you know them.
Watch for these:
- Clothes take two or more cycles to dry.
- The dryer feels hot to the touch on top.
- The laundry room feels humid or steamy.
- You smell a burning odor.
- The outside vent flap barely moves.
Inspect the Heating Element, Thermostats, and Gas Igniter
The heating element is a coil that glows red when powered. If it breaks, the dryer runs but never heats. A continuity test tells you if the coil is still intact, but on this section you also need to know what a failed part looks like, because visual cues often save you a meter reading.
What a Burnt Heating Element Looks Like
Pull the coil housing (usually a metal box near the bottom of the cabinet) and inspect the element before testing:
- Visible break: a clean gap in the coil wire, often with a small bead of melted metal at the break point.
- Sagging or stretched coil: the wire has lost tension and is touching the housing, a short risk.
- Discolored or blackened coils: localized overheating, even if the wire is still continuous.
- White or gray powder on the coil: normal oxidation, not a failure.
Testing the Heating Element for Continuity
- Unplug the dryer and remove the back panel.
- Find the coil housing, usually a metal box near the bottom.
- Disconnect the two wires from the element terminals.
- Set the multimeter to the lowest resistance range (200 ohms) or continuity.
- Touch a probe to each terminal.
A reading near zero means the element is good. An OL reading means it’s broken and needs replacement. A reading in the low tens of ohms is also normal for many elements, what matters is that it is not OL.
Testing the Cycling and High-Limit Thermostats
While you’re in there, check the cycling thermostat and high-limit thermostat. Both control heat. The cycling thermostat turns the element on and off to hold temperature; the high-limit thermostat is a safety cutoff that trips on overheating, just like the thermal fuse.
- Cycling thermostat: should show continuity at room temperature. OL means it failed open.
- High-limit thermostat: should show continuity when cold. OL means it tripped and needs replacement.
Gas Dryer: Igniter, Flame Sensor, and Gas Supply Valve
Gas dryers need three things in order: gas flow, a spark, and a sensor that confirms flame. If any one fails, no heat.
- Gas supply valve: Confirm the valve behind the dryer is fully open. A partially closed valve can starve the burner.
- Gas igniter: Watch for a glow when the dryer starts. No glow means a bad igniter. A cracked or white-crusted igniter is a common visual failure.
- Flame sensor: This confirms the burner lit. A dirty sensor shuts the gas off. Clean it with fine steel wool and retest.
- Coils (gas valve solenoids): If the igniter glows but the burner never lights, the valve coils are the usual suspect. They can test good cold and fail hot, a known intermittent pattern.
Gas appliance repair beyond cleaning and visual inspection should be handled by a licensed technician. Do not disassemble the burner assembly or gas valve yourself.
Dryer Heating Element Replacement Cost and Repair Decisions
Dryer heating element replacement cost depends on the part, the brand, and whether you do it yourself. We can’t quote a flat number here because pricing varies by model and part availability. For a current quote, check current appliance part pricing through RepairClinic or book a diagnostic with us.
Use this decision guide:
| Situation | Best Move | Why |
|---|---|---|
| One failed part, dryer under 8 years old | Repair | Cheaper than a new unit |
| Two or more failed parts | Get a quote first | Costs add up fast |
| Dryer over 12 years old | Weigh repair vs. replace | Parts get scarce |
| Repeated fuse failures | Fix the vent first | Root cause is airflow |
When to Stop DIY and Call a Licensed Technician
- You smell gas anywhere near the dryer.
- The wiring harness shows melted or burnt wires.
- You’ve replaced a part and the dryer still won’t heat.
- You’re not comfortable working around 240-volt voltage supply lines.
- The terminal block or power cord looks damaged.
Most no-heat dryers come down to airflow or one failed safety part. Clean the vent first, test the thermal fuse second, and replace the element third.
At Tampa Bay Appliance Repair LLC, our licensed and insured technicians handle dryer repairs across the area. We offer free diagnostics with any repair, so you get a clear answer and a real price before work starts. We’re EPA Clean Air section 608 certified and respond to appointment requests within one business day.
Frequently Asked Questions
Why is my dryer running but not heating up?
A dryer that tumbles but blows cold air usually has a failed thermal fuse, a burned-out heating element, or a tripped circuit breaker. On electric models, check the breaker box first because dryers use two breakers and one can trip while the drum still spins. On gas models, a clogged vent or faulty igniter is often the cause. Testing each part with a multimeter narrows it down fast.
How do I reset a dryer that isn’t heating?
Unplug the dryer or flip its breaker off for two minutes, then restore power and run a timed cycle on high heat. If it still blows cold air, the problem is a failed component rather than a tripped control. Some models also have a reset button on the blower housing behind the lower panel. If a reset does not restore heat, the thermal fuse has likely blown and needs testing.
Can I still use my dryer if the heating element is broken?
You can run the dryer, but it will only tumble clothes in room-temperature air, so loads take far longer and may smell musty. Continuing to run an electric dryer with a broken element is not dangerous by itself, but a blown thermal fuse or a clogged vent that caused the failure is a fire risk. Stop using the dryer until you identify the root cause.
Is it worth fixing a dryer that won’t heat?
In most cases, yes. A thermal fuse, thermostat, or igniter replacement is a small part of the cost of a new dryer, and dryers commonly last 10 to 13 years. If the dryer is under eight years old and the drum, motor, and control board are healthy, repair makes financial sense. If the unit is past 12 years or needs multiple major parts, replacement is usually smarter.
A dryer that won’t heat disrupts your whole routine, and guessing at parts gets expensive fast. Tampa Bay Appliance Repair LLC takes the guesswork out with free diagnostics alongside any repair, licensed and insured technicians, and same-day scheduling across the area. Get started with Tampa Bay Appliance Repair LLC and get your laundry back on track.